Reference Photo and Voice: How to Create a Realistic Avatar
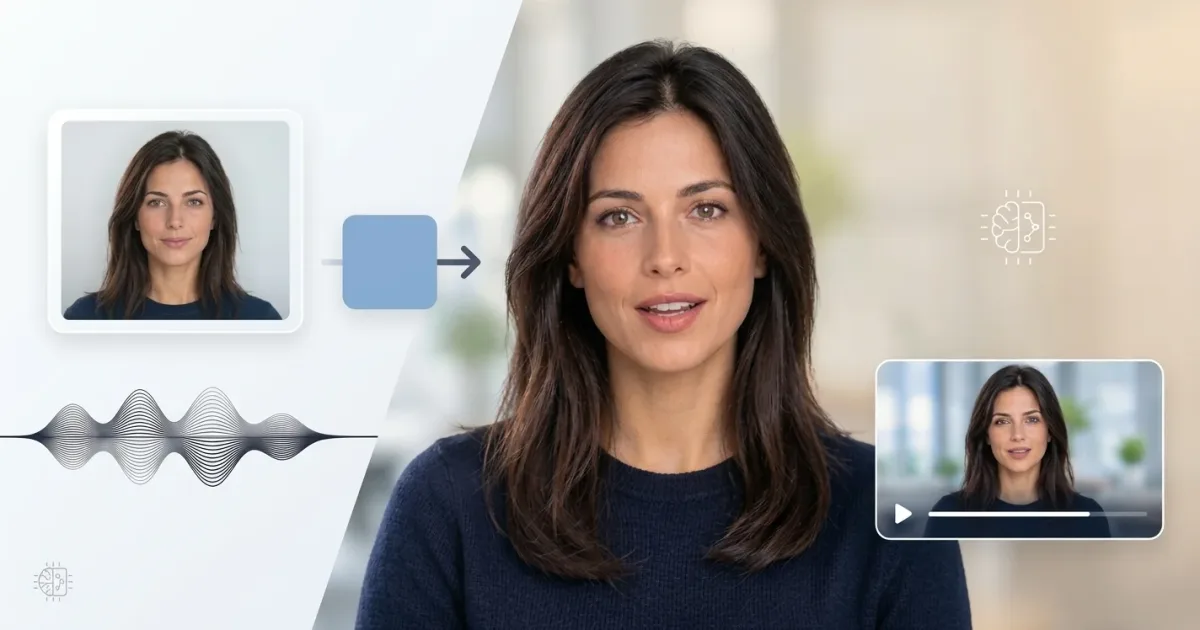
The quality of a video avatar depends as much on the generation model as on the data provided to it. A poorly exposed photo can limit facial likeness, while a noisy voice sample can degrade voice reproduction and audiovisual synchronization.
Sommario
- Understanding the Role of Reference Inputs in Generation
- Optimizing the Reference Photo to Preserve Facial Identity
- Controlling Lighting, Contrast, and Framing
- Preparing a Usable Voice Sample
- Understanding the Duration and Content of the Voice Reference
- Adapting the Script for Speech Synthesis and Lip Synchronization
- Checking Audiovisual Consistency
- Adopting a Reproducible Testing Method
- The Most Common Technical Mistakes
Understanding the Role of Reference Inputs in Generation
A video avatar generation system uses different types of information to produce a coherent sequence. Depending on the architecture, the photo may condition the avatar's appearance, while audio or text drives speech and, directly or indirectly, facial movements.
The quality of the reference inputs therefore affects several aspects of the result: identity preservation, facial detail rendering, natural expressions, and consistency between lip movements and the audio signal.
One distinction is important: high-quality references alone do not guarantee perfect generation. The result also depends on the model, its limitations, and how it interprets the inputs. The goal is to provide sufficiently clear and consistent data to minimize ambiguity.
Optimizing the Reference Photo to Preserve Facial Identity
For most image-based avatar generators, a front-facing photo is a reliable starting point. The face should be sharp, large enough in the image, and fully visible. Looking directly at the camera, with a neutral or slightly smiling expression, helps achieve a consistent appearance.
Avoid significant head rotations, occlusions, beauty filters, and retouching that alters facial geometry. These elements can make facial features more difficult to interpret or lead to variations in appearance throughout the video.
The resolution should be sufficient to distinguish the eyes, nose, mouth, and facial contours. Artificially increasing the resolution of a blurry image will not restore missing details. It is better to start with a sharp photograph than to rely on enhancement processing.
Controlling Lighting, Contrast, and Framing
Lighting does more than improve the aesthetics of a photo. It also determines how clearly the facial features that define contours and depth can be seen.
Soft, diffused, and relatively even lighting minimizes harsh shadows around the eyes, nose, and mouth. Strong backlighting can underexpose the face, while excessively intense frontal lighting can flatten facial features and create overexposed areas.
Choose a front-facing composition, with the head and shoulders visible when the format allows it. Avoid extreme cropping and unusual perspectives caused by positioning the camera too high or too low.
Practical test: Compare two photos of the same person, one taken against the light and the other facing a window. With identical framing, the second image generally presents more clearly defined features and better-distributed detail. This is the level of clarity to aim for, without confusing sharpness with artificial oversharpening.
Preparing a Usable Voice Sample
The reference voice provides the system with information about vocal timbre, voice texture, and, depending on the tool, certain aspects of rhythm and intonation. The recording must therefore preserve the vocal signal without introducing unnecessary artifacts.
Record in a quiet room with minimal reverberation. Keep the microphone at a consistent distance from your mouth, generally around 10 to 20 centimeters depending on the equipment, and position it slightly to the side to reduce plosive sounds. Adjust the input level to prevent clipping.
When supported by the service, favor an uncompressed recording format such as PCM WAV. A sample rate of 44.1 or 48 kHz and a 16-bit resolution are common choices for clean recordings, but the generator's specifications should always take priority.
Avoid aggressive noise reduction, added reverb, and processing that changes the vocal timbre. An artificially cleaned signal can introduce artifacts that are more disruptive than the original background noise.
Understanding the Duration and Content of the Voice Reference
A voice sample should be long enough to provide a useful representation of the voice without becoming unnecessarily repetitive. The optimal duration depends on the system: some tools work with just a few seconds, while others benefit from a longer excerpt.
Choose several natural sentences rather than a sequence of isolated words. Variations in pitch, transitions between sounds, pauses, and different sentence structures provide a more complete representation of the speaker's speaking style.
A monotonous excerpt may not reflect the speaker's usual prosody. Conversely, an excessively theatrical performance can produce a reference that does not accurately represent their everyday voice.
Use only your own voice or a recording for which you have the necessary authorization. Technical fidelity does not eliminate the need to respect consent and the rules governing voice reproduction.
Adapting the Script for Speech Synthesis and Lip Synchronization
The script directly affects the timing and structure of generated speech. A long, information-dense sentence can result in an unnatural speaking rate or leave insufficient room for the pauses needed for a smooth delivery.
Write out numbers, dates, abbreviations, and acronyms in a way that makes their intended pronunciation explicit. Punctuation helps structure the rhythm, although its precise effect depends on the text-to-speech engine.
Lip synchronization, or lip-sync, involves aligning mouth movements with speech. It does not depend solely on the total duration of the audio: transitions between phonemes, consonants, vowels, and silences also play a role.
To facilitate alignment, avoid ambiguous wording and check the pronunciation of technical terms, proper nouns, and acronyms. If the system accepts prerecorded audio, make sure the track used for animation matches exactly the one that will be played in the final video.
Checking Audiovisual Consistency
An avatar may look realistic in a still image while displaying flaws during animation. Problems often appear during transitions between expressions, jaw movements, blinking, or changes in head position.
Evaluate the result as a video sequence rather than relying solely on a still frame. Check facial identity consistency, the coherence of mouth movements, the absence of temporary distortions, and the continuity of expressions.
Also listen to the audio track separately. A convincing voice paired with imprecise animation indicates a different problem from correct animation accompanied by an artificial-sounding voice or poor articulation.
Adopting a Reproducible Testing Method
To identify the source of a defect, start by generating a short sequence of approximately ten seconds using a simple script and natural speech.
Keep the same settings during the initial comparisons, then change only one variable at a time: the photo, the voice sample, or the script. This approach makes it easier to isolate the factors that influence the result.
Evaluate each version against four criteria: facial likeness, voice naturalness, lip synchronization, and temporal consistency. Whenever possible, retain the source files and settings used for each test.
This method turns successive adjustments into an optimization process rather than a series of randomly generated outputs.
The Most Common Technical Mistakes
Some errors may be mistaken for model limitations when they actually originate in the source files:
A blurry or overexposed image that reduces facial feature clarity.
An extreme camera angle or a partially obscured face that makes identity reproduction more difficult.
Clipped or reverberant audio that degrades vocal signal quality.
A sample that is too short or unrepresentative, limiting the information available about the voice.
A dense or ambiguous script that encourages unnatural speech.
An evaluation based solely on a still image, which can conceal animation defects.
The first step in troubleshooting is to examine the inputs, generated audio, and final video separately. This helps distinguish a data preparation issue from a limitation of the generation engine itself.
Dalla lettura alla pratica
Crea le tue voci fuori campo e i tuoi video IA con Incarneo, senza abbonamento: paghi solo i minuti generati.
Da leggere dopo

Voce fuori campo IA o voce umana: quando scegliere cosa
Una voce fuori campo IA è rapida, economica e modificabile a piacimento. Una voce umana porta un’emozione e una presenza che la sintesi non sempre eguaglia. La scelta giusta dipende meno dalla tecnologia che dal progetto, dal pubblico e dal budget.
Commenti (0)
Ancora nessun commento — avvia la discussione!